Getting Started - Designers
Designers who wish to work with Vega will want to gain access to the raw Figma files, where they will be able to use existing Vega components in their designs.
Installation
To work with Vega as a designer, you will first need to obtain a copy of Figma.
Create a free account using your Heartland email address. You may work either online, or by using the free desktop application, which is downloadable by clicking on your username and choosing “Get Desktop App” from the menu that appears.
Logging In
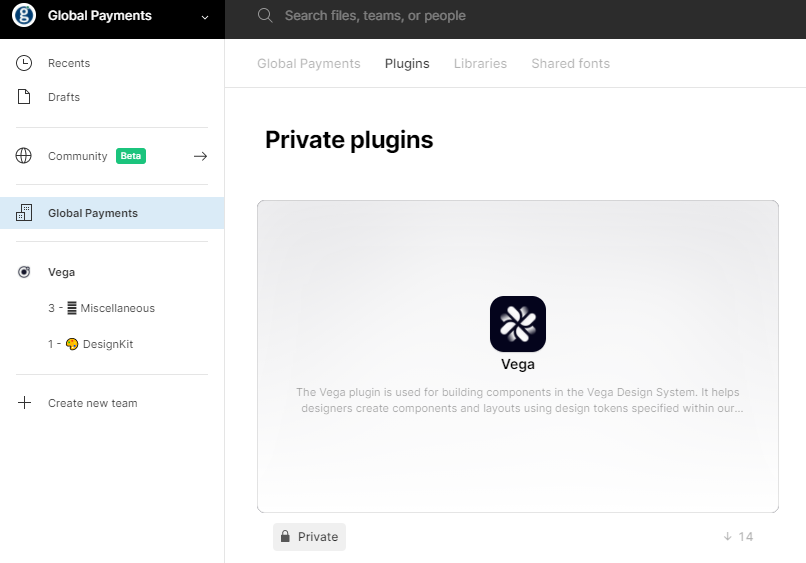
To work with Vega, you will need to login with your Heartland credentials, and then go to the Global Payments portal. Click on the “home” icon and choose “Global Payments.”

You will see the Global Payments team on the left.

Get the Vega Plugin
From the top menu, click on “Plugins” to obtain the Vega plugin (it should be the only one showing if you are logged in correctly).
Choose the plugin, and click “install”

Working with the Plugin
To use the plugin, first open a file.
Click on the Figma icon, select plugins, and choose Vega.
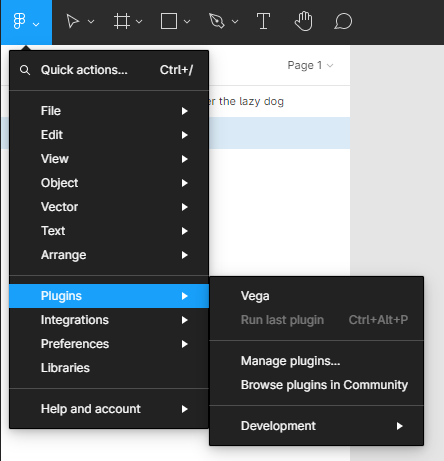
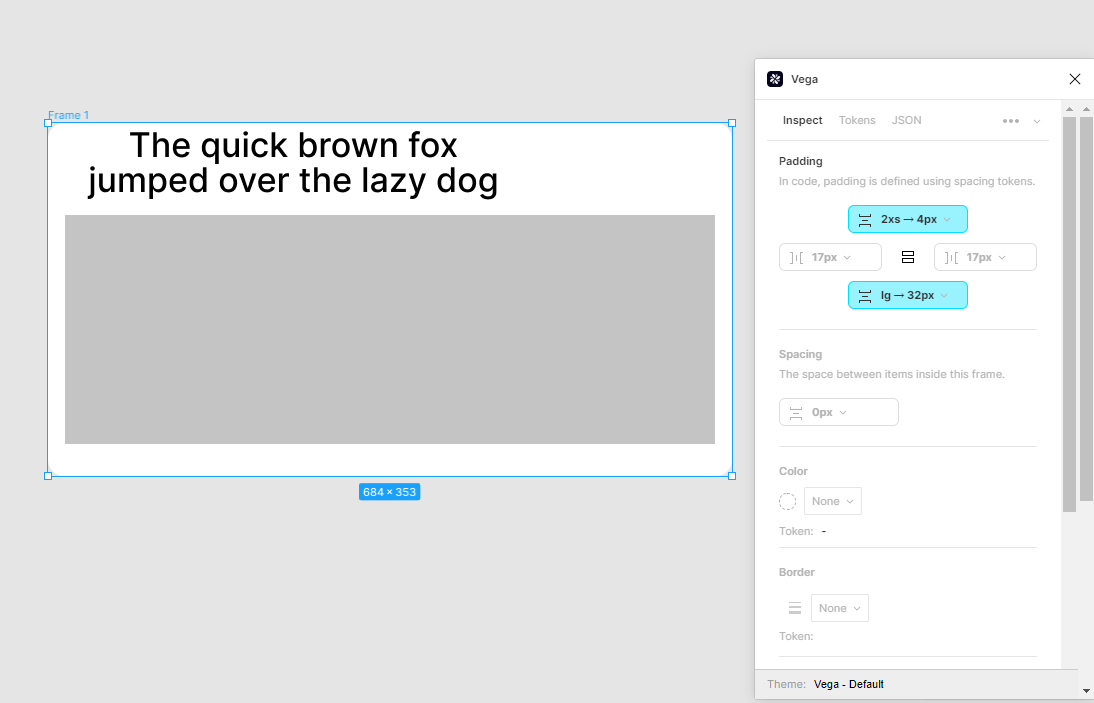
This will open the Plugin window, which will look something like this:

There are three tabs: Inspect, Tokens, and JSON. For the most part you will be using the Inspect tab.
Select a layer in your file to be able to see which tokens are available to you. Note: the type of tokens you see that are available are dependent on the type of layer you select.
Auto Layout
To be able to see real time updates as you work with the Vega plugin, you will need to have Auto Layout enabled for whichever frame you are working in. To turn on auto layout, select a frame, and from the Figma right-menu, select “Auto layout.”
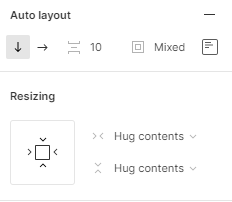
Note: due to a limitation in Figma, you may need to deselect a layer and reselect it to get auto-layout to work properly with the plugin.
Frames
If you select a frame, you have the option of changing:
- Padding
- Spacing
- Color
- Border
- Shadow
- Corner radius
- Mode
Note: tip for padding layouts - if you use the keyboard shortcut Option-click on a Mac, or Alt-click on a PC, changes to the top padding will also change bottom padding. The same is true for left and right. If you wish to change the padding for all four sides, choose either Command-click (Mac) or Ctrl-click (PC).
Layers
You may also select individual layers and apply styles to them accordingly. For example, here is a simple text layer. Here you will be able to see a series of Typography tokens available to you.
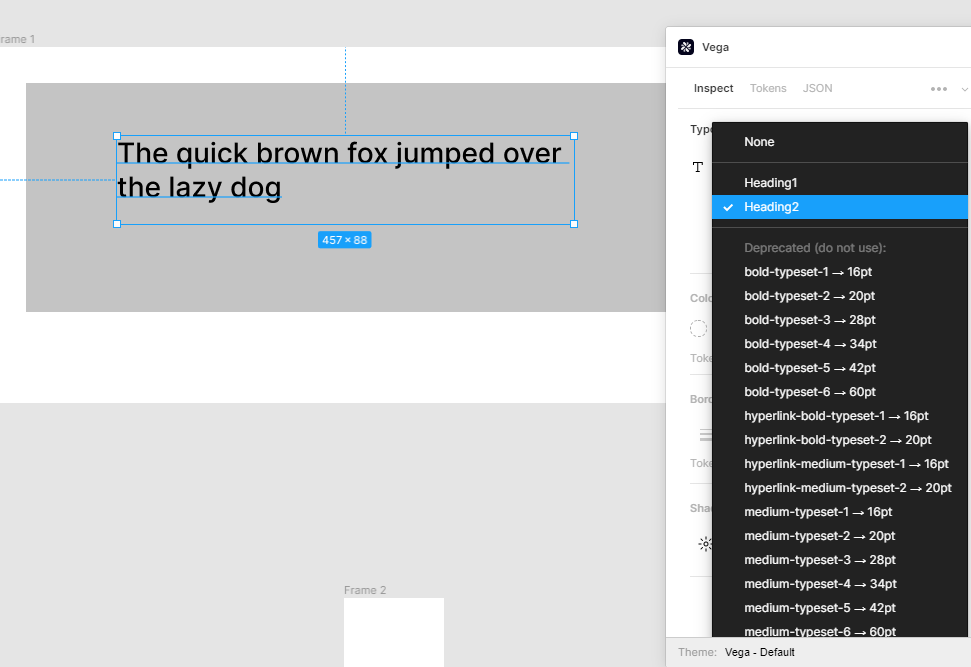
Note: While you may be used to being able to select fonts, etc., from the bar on the right in Figma, by using the Vega plugin, you will be able to ensure that whatever styles you choose are consistent with the Vega Design System. This will ensure you are using only Vega tokens.
Breakpoints
You have the option of setting different sizes for different breakpoints so that your content renders properly on different platforms and different-sized devices, such as mobile phones, tablets, etc.
To do so, select the different size device from the breakpoints in the plugin:

You will see your selected layer resize or adjust depending on the size you have chosen.
In the context of typography tokens, this will result in a change of the font size and weight of the selected text layers when a new breakpoint is applied to that layer.
If you select a different breakpoint, you will be applying a different variant of the typography token. This is because text needs to be styled differently for different breakpoints.
Tokens tab
You may use this tab for getting a full overview of all of the tokens available, including a graphical representation of how they will look.
This tab is divided into three sections, Alias tokens, Base Tokens, and Deprecated.
While base tokens are the atoms of the Vega system, they should not be used, due to the chance that design patterns may change at some point in the future. Alias tokens are divided into categories, much like those described above:
- Colors
- Typography
- Spacing
- Shadows
- Borders
- Corners
- Icons
- Breakpoints
Deprecated tokens are old tokens which are no longer used due to changes that have occurred in Vega. They remain in the system due to old layers which are linked to these deprecated tokens.
For this reason, you should only use Alias tokens in your designs. The others may, however, be helpful for reference purposes.
Alias Tokens

Base Tokens:

JSON
This tab is for code representation of the tokens as they are fed between the Chimera and the Tiger teams. They exist primarily for use in the API and for debugging purposes.

Engineers/Developers
The plugin contains information that is also valuable to engineers who wish to gain access to information about the individual tokens being used in a design.
When an engineer selects an individual element in the design system, they can see the actual named tokens with which they can work. It will show the token name and list all of the attributes associated with each.
For this reason, the Vega Figma plugin can serve as a single point of reference for all design tokens.
To learn more, please review the Vega Plugin guide.